Cool Easy Sign Designs Easy Poster Board Design
Everyday and everywhere, you are surrounded by letters and written messages. From logotypes to posters, billboards, t-shirts or book covers, letters not only tell a story but evoke certain emotions as well. What if, instead of using an already existing font, you could draw beautiful hand lettering that's full of personality?
Even if you've already dipped your toes into the infinite universe of hand lettering, or you've thought about trying it out but weren't sure where to start, you are in the right place! We're going to take a look at the essentials that you need to start this wonderful journey of hand lettering.
I've been hand lettering for a little over a year, and it all started when a weekly challenge popped up on Instagram and I decided to enroll. I previously played around with calligraphy, but I wasn't really sure what the difference between that and hand lettering was. I had zero experience, never taken a class, never watched someone do it live. I just thought it would be fun—and it was! Since then, I've been lettering almost daily, and learning this skill has been one of the best things I've ever done!
By the end of this article, you'll know the basics of hand lettering and have the confidence to create your own pieces!
What is hand lettering?
—
Many people out there confuse hand lettering, calligraphy, typesetting and type design and use the term "type" or "typography" to refer to all of these.

Type design
Type design is the process of making typefaces which all of us can use. A type designer creates systems of letters, making sure that all letters of the alphabet work together in endless combinations.
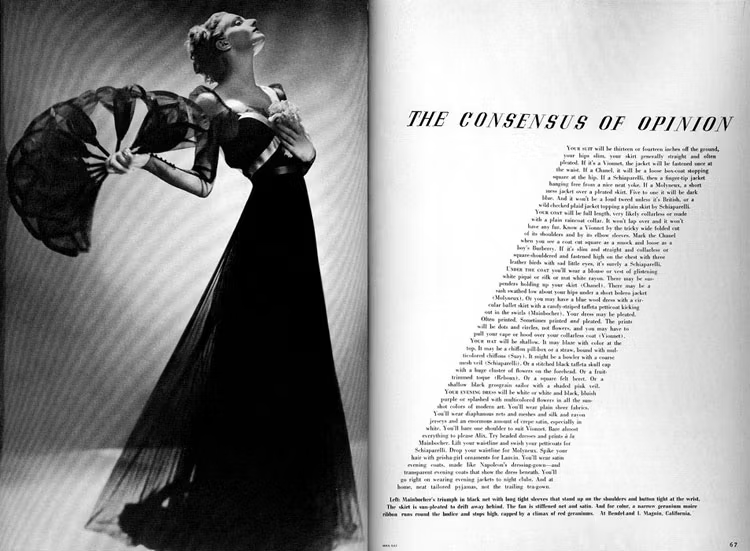
Typesetting simply means arranging type that's been created by a type designer in a given layout. This might be as simple as a black and white newspaper or as complex as a typography-driven brochure.
Back in the day, this was done by hand. Today, we do it all on a computer.
Calligraphy
Calligraphy is flawless, gorgeous handwriting. After many years of practice, calligraphers use muscle memory to perfect their style so that the next time they gets commissioned to create a wedding invitation, for example, they can perfectly write all the copy on the first try. Although hand lettering often imitates calligraphy, the process behind the two is very different.
Hand lettering
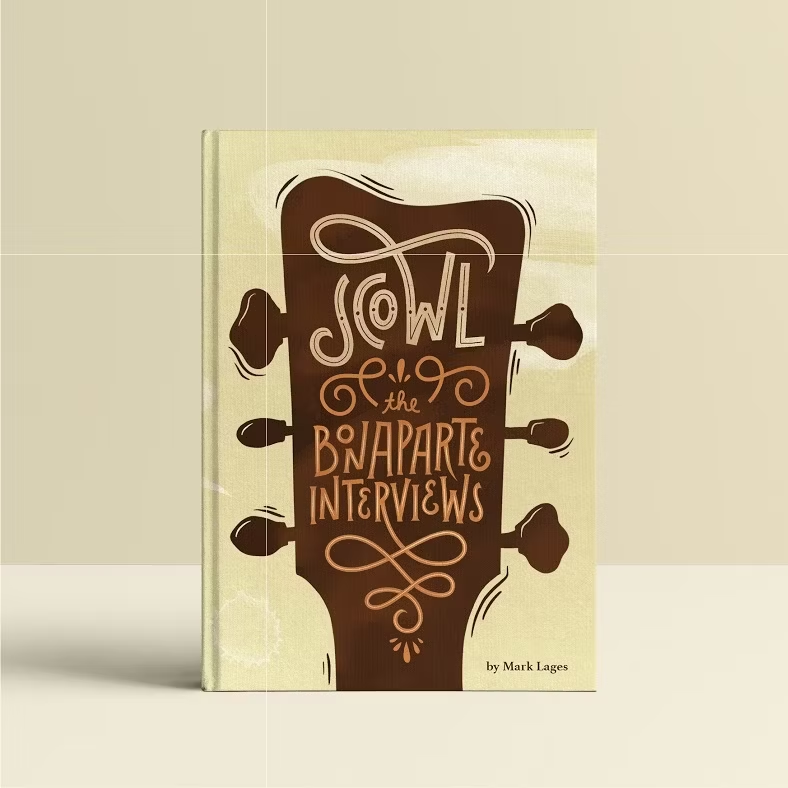
Finally, hand lettering is the art of drawing letters and can take on many shapes and sizes, from traditional-looking letters to intricate, detailed and not-so-obvious looking ones. This can be done in any style, on any material, with any media.
Even though there are no rules in hand lettering, there are still guidelines that we need to take into consideration.
How to start hand lettering
—
Before we start, let's take a quick look at how hand lettering can be used. You might be surprised to see just how many ways there are to use this art form!
1. Get your tools
You don't need any fancy tools to be a hand-letterer. When I started to get into lettering, I thought I needed the most expensive and professional pens, judging by all those super-duper shots from Instagram. I bought a bunch of brushes and pens which I probably used… five times?
The only tools you will truly use are a pencil, paper, eraser and ruler. If you want your lettering to look calligraphic, consider using the proper calligraphic tools (such as brush pens or nibs), but you can do just fine without (more on that later).
If you want to bring your lettering in the digital medium, there are a few ways to make it happen. To start digitally from scratch, use a graphic tablet or an iPad Pro and Apple Pencil to draw. Or scan your piece, and edit it in Photoshop or Illustrator by using the built-in tracing option or by tracing it yourself using the Pen tool.
2. Know about letter construction and relation
Guidelines are very important in the process of drawing letters. They help you keep your letters in proper proportion so they'll have a harmonious relationship between one another.
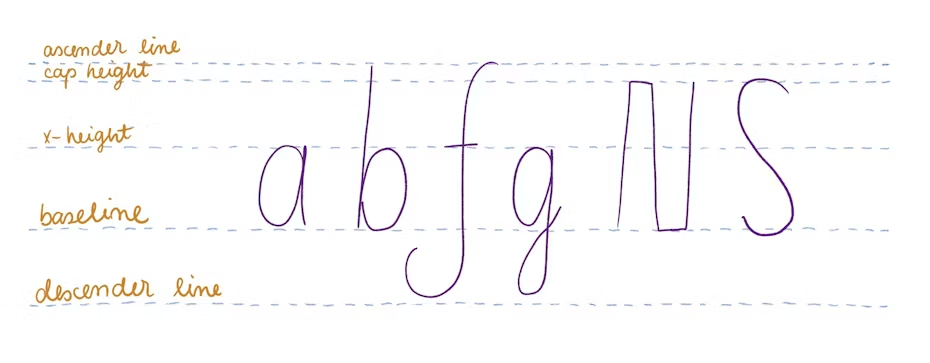
The ascender line shows how long the ascender of a lowercase letter should be (like l, h, b). The cap height is the height of an uppercase letter. The x-height is the height of a lowercase letter and the line that holds the crossbar. The baseline is where all letters rest. The descender line shows how long the descender of a lowercase letter should be (like p, j, g).
In some cases, you'll have to slightly ignore these guides and make some optical adjustments.
Here is a technique I've learned from Martina Flor. No matter what style of lettering you use, there are a few basic shapes that we work with—shapes she calls "mother forms." We have rectangular shapes (like the letters H or E), triangular shapes (like the letters V or A), rounded shapes (like the letters O or C) plus the combination of all of these.
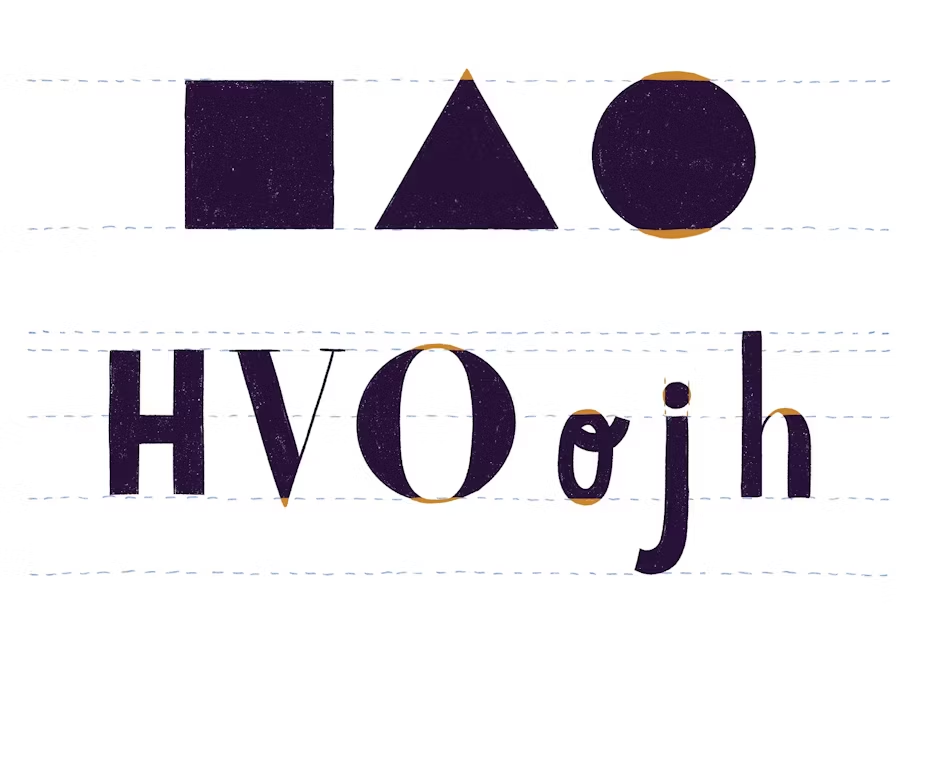
If you have all these shapes on the same baseline, all the exact same size, the circle and the triangle would look significantly smaller than the rectangle. Why? Because the square touches the baseline and cap height with its entire border, while the circle and triangle don't.
Even if technically they are the same size, optically they're not. This is when you'll use your eyes and instincts to enlarge those letters just a little over the baseline and cap height. How much should you enlarge them? Well, that's up to you! In time, you'll find it easier until you'll do it without even thinking about it. The same rule goes for the lowercase letters, too.
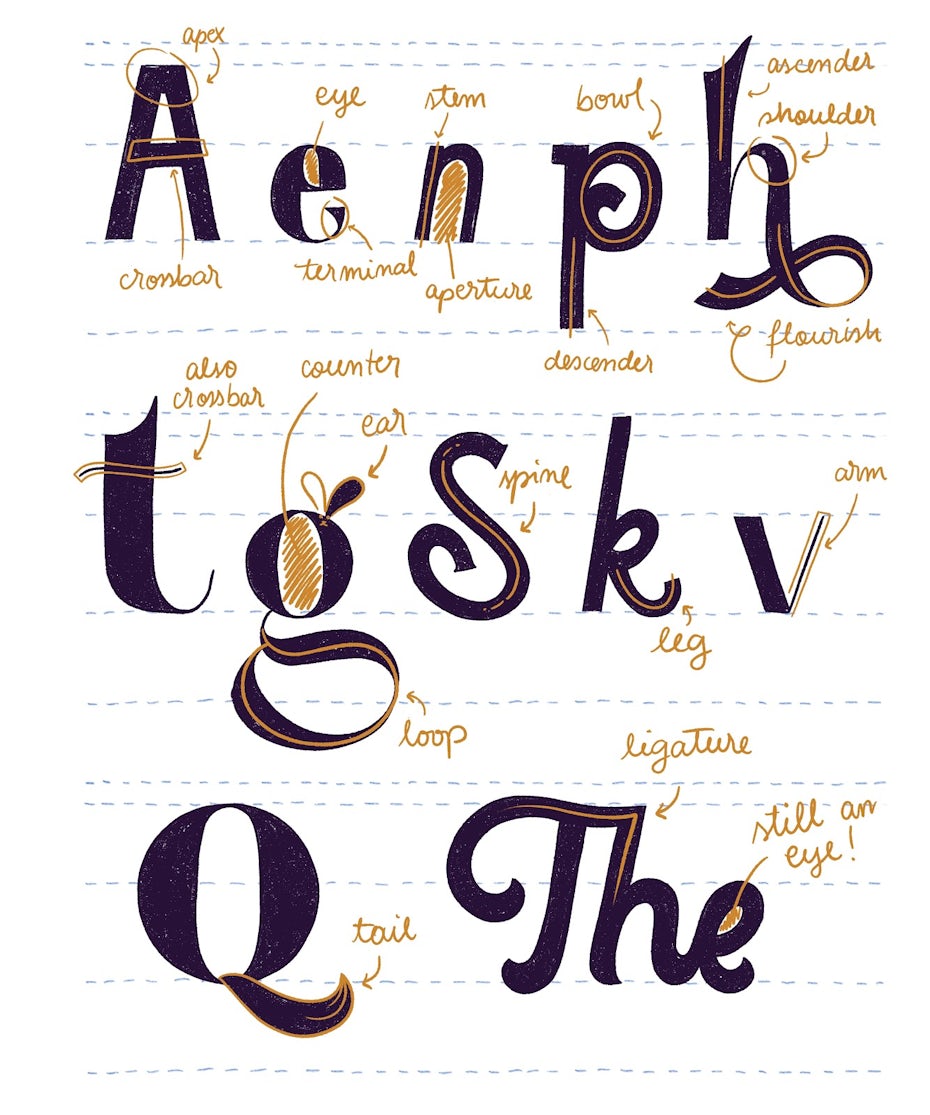
3. Learn the anatomy of letters
Before you dive into the actual lettering, it's important to know the most commonly used terms, so that next time you'll be able to call the 'little thing on the end of a lowercase letter' by its proper name—a terminal. Once you know these terms, you'll be able to talk with anyone about this topic.
Here are the ones you'll use the most:
4. Choose a lettering style
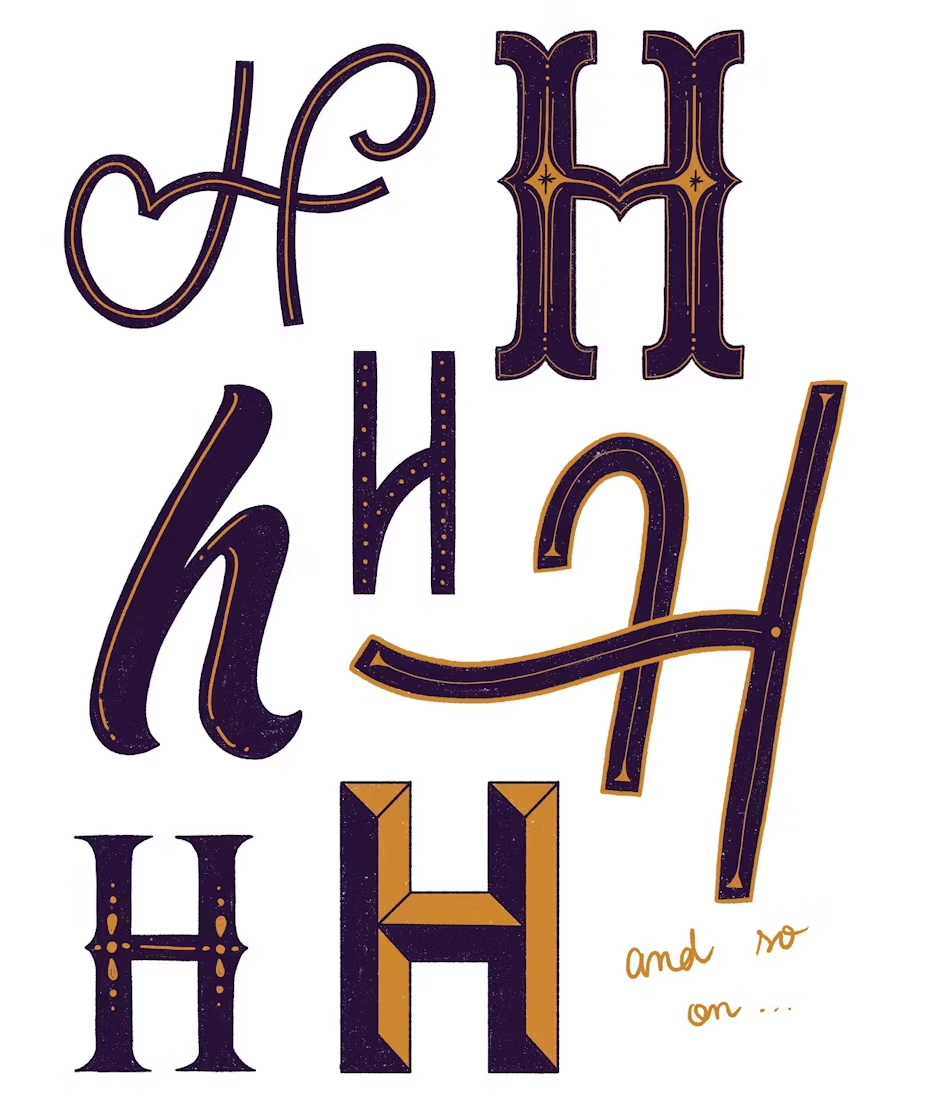
This is where we go wild! As a letterer, you have to know all the different styles so you can choose the one that fits your current project the best. Knowing the basic styles will help you create endless variations of the same letter.
We still have some rules to play by, but your imagination can go crazy!
The most important rule to keep in mind at all times is legibility. You can create the most ornate, fancy looking E, but at the end of the day, if it can't be easily recognized as an E you failed. Since there's not just one right way to draw an E (except for its basic skeleton, which can still be modified), it's up to us to decide how to draw it.

Ready? Here we go!
Serif lettering
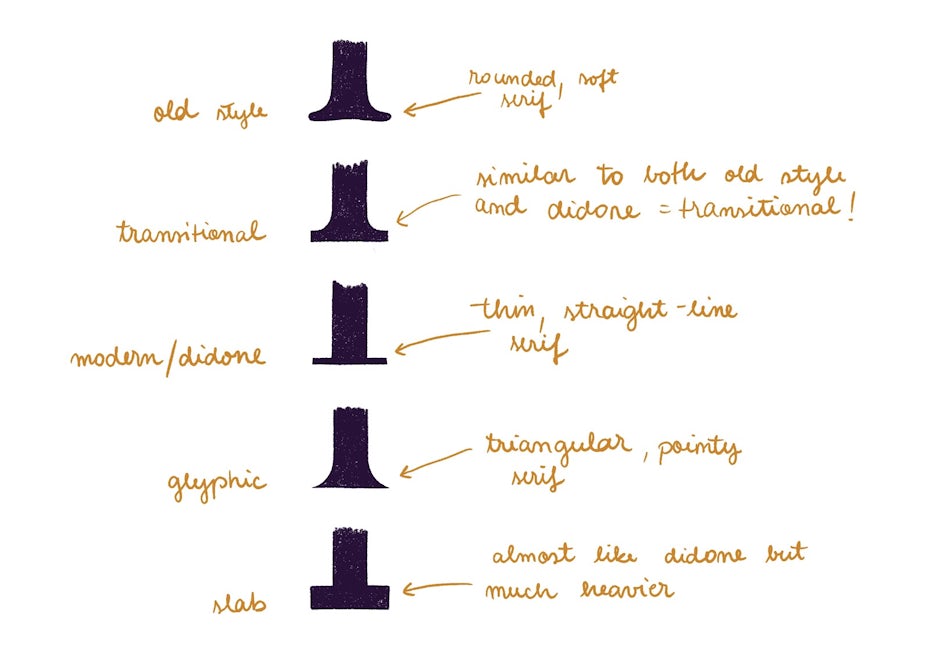
A serif is the small line attached at the end of a letter's stroke. Initially, it was invented to help with legibility but designers and letterers have pushed it and reinvented it many, many times, creating some really funky and interesting serifs.
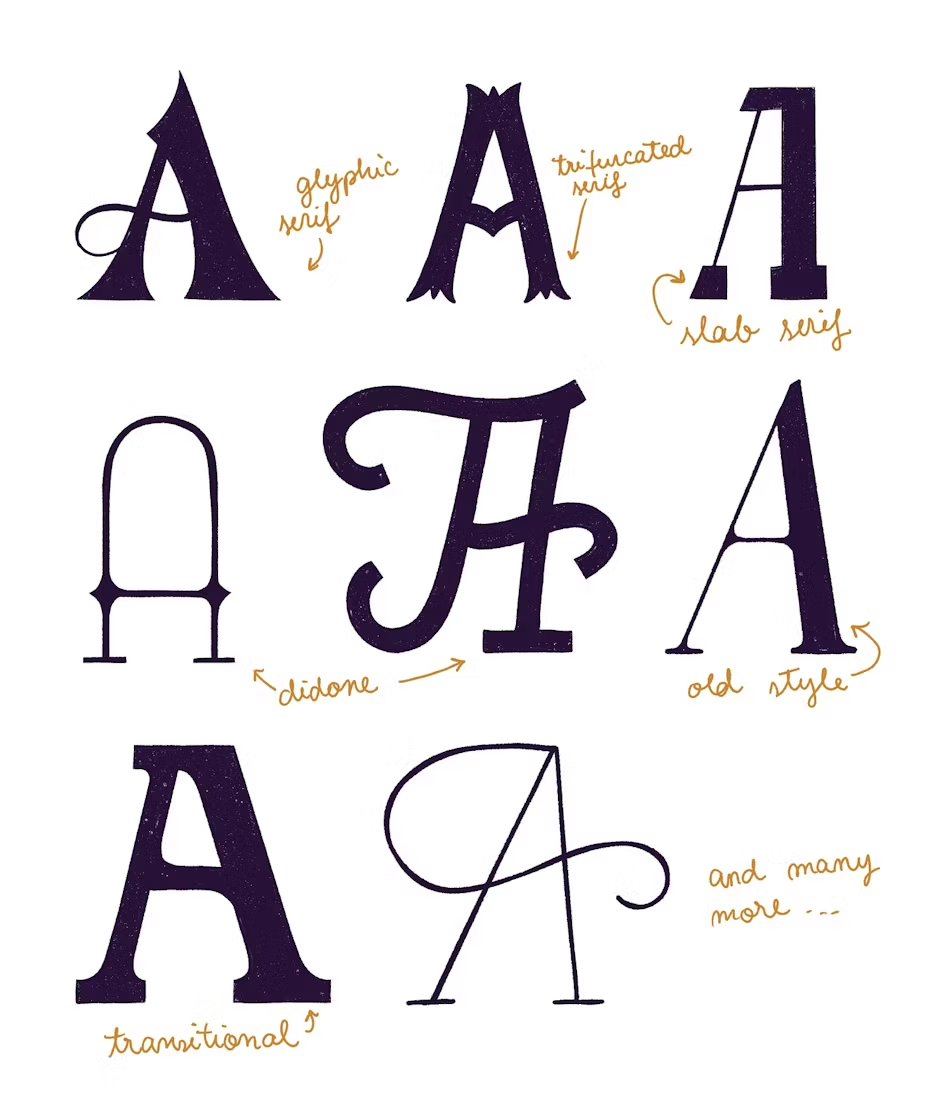
Within this category, there are many other styles. We've got old style serifs, transitional serifs, didone or modern serifs, glyphic serifs or slab serifs. Whoa, right?
Let's take a look at what all these look like:
And here are a few examples of all the ways you can use them:
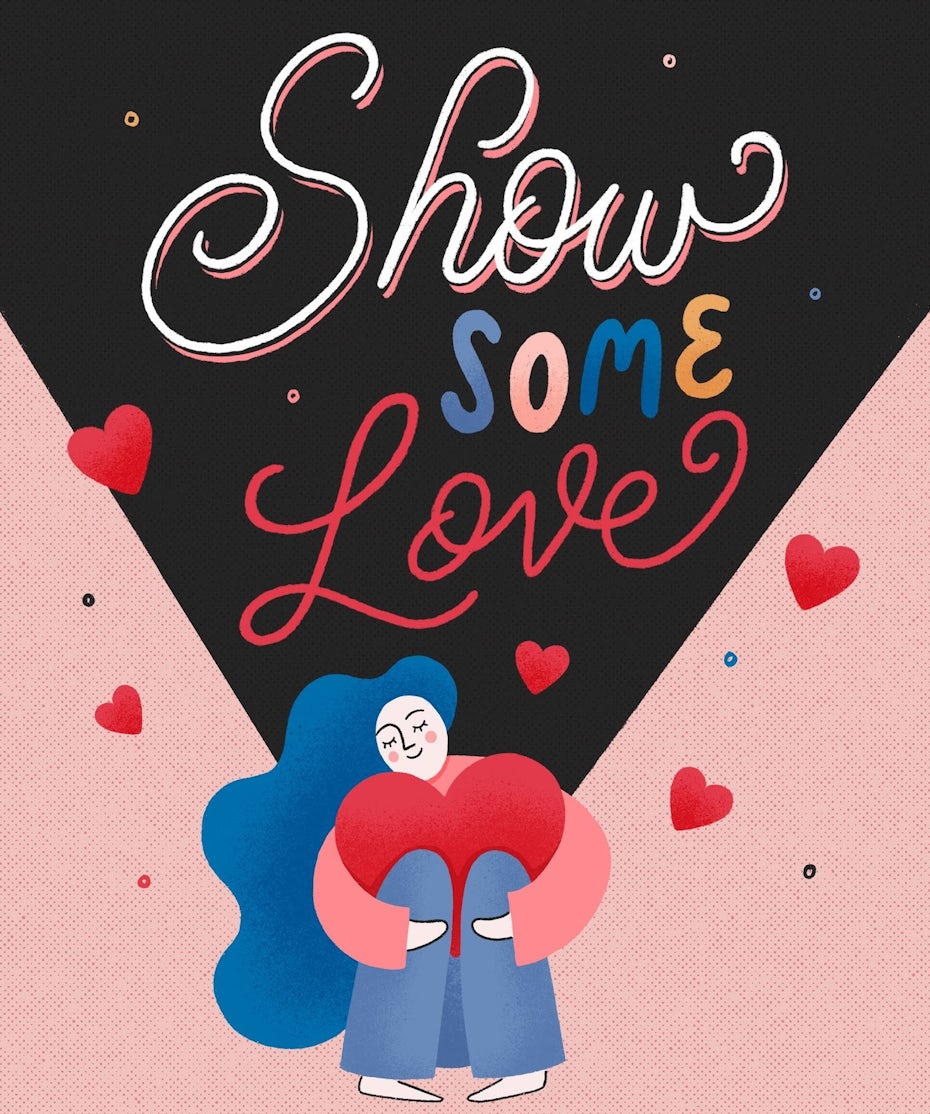
Sans serif lettering
"Sans" means without. So this category of lettering contains typography that has no lines attached to the ends of each letterform. Sans serif lettering is often used to convey a more contemporary style.
Even though these letterforms have a more basic structure than serifs, there are still a number of creative ways to do this. You might think there's not much you can do with something so simple, but let me prove you wrong!
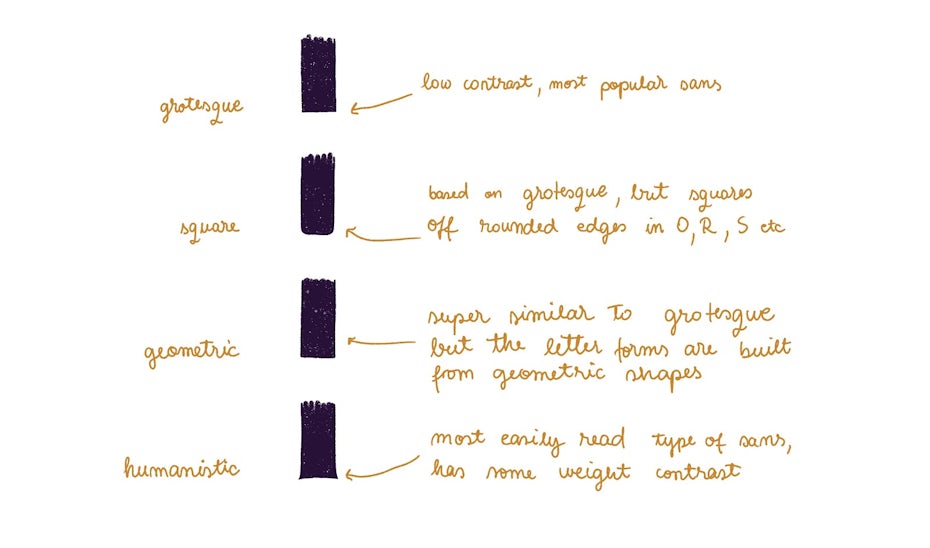
Let's see a few of these in action:

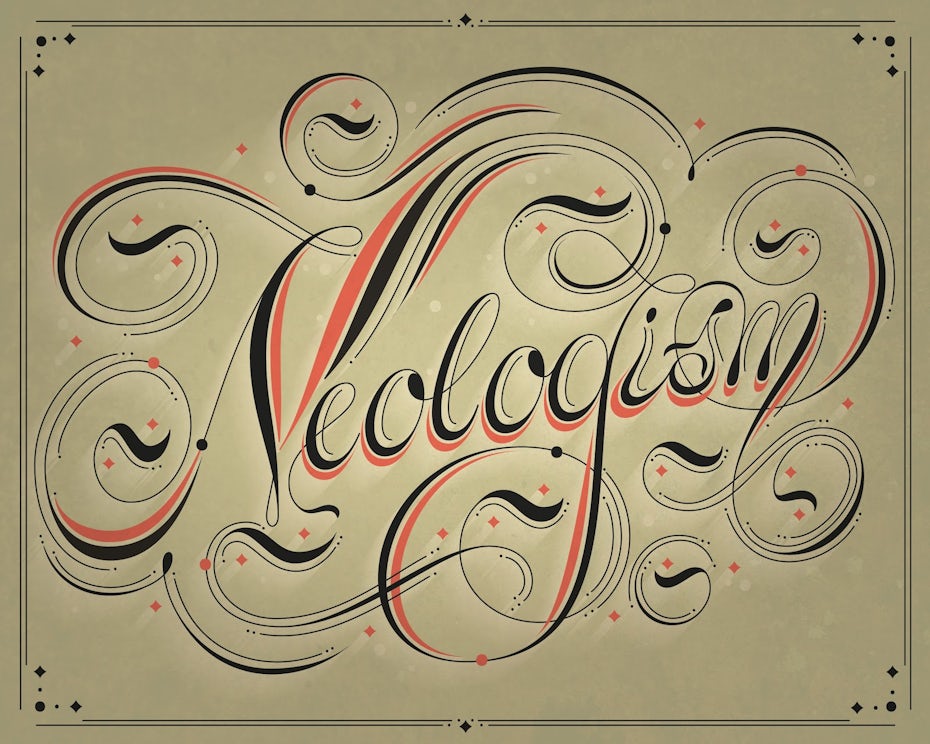
Script and brush lettering
Script and brush lettering refers to letterforms that are connected to each other. This can be very formal looking and elegant, playful or even super trashy. This style imitates calligraphy, but instead of drawing the letters with a single movement of the hand like you would in calligraphy, you draw the letters from many little pencil strokes to build that look.
The most important rule to keep in mind is that a letter's upstroke is always thin, and its downstroke is always thick. Up thin, down thick. You minimize the pressure of the pen on the ups, you push and create more pressure on the downs. Up thin, down thick. Up thin, down thick. That's just four words to memorize!
You can also play around with a brush pen or different nibs to get the feel of the stroke so that you'll know what you have to imitate.
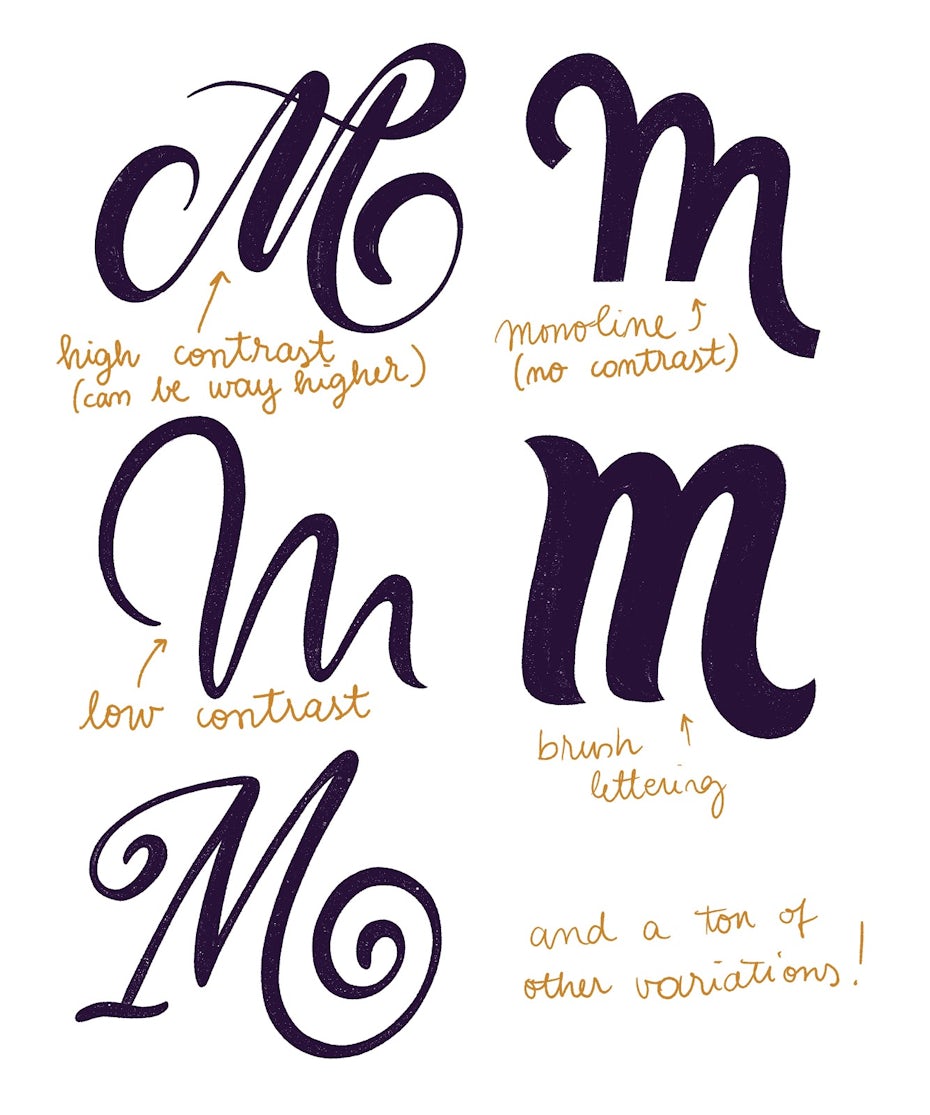
These are the three basic lettering styles. Tweak them however you please, and get to some really crazy, funky looking letters.
Make the letters very slim or very fat. Invert the weights to get that groovy feel. Add a super heavy weight contrast. Use really crazy serifs or flourishes.
There's really no limit to what you can achieve. Just have fun with it!
5. Add dimension, details and decorative elements
Now that you are more familiar and comfortable with the basic style categories, let's take a look at what we can do to make them more interesting and decorative.
Adding dimension and shadow
When we talk about dimension, we're talking about three types of shading: the drop line, drop shade and drop shadow. You can create these by drawing the same shape behind your main one. Simple as that. If you got comfortable with creating these you can play around with them and make some really interesting shadows to make your letterforms even more expressive.
For example, you can create a vanishing point and connect all the edges of the letter (or word) to the same point, or you can have some really heavy, bold shadows, playing with the positioning.

If you have all your dimension added you can go ahead and add even more depth. Decide where your light source is coming from and draw the dark parts in wherever the light wouldn't touch your letter.

An easy way to figure this out is if you imagine your letter is an actual object on a table. Look at different objects in your room, both rounded and rectangular, to get a feel of how the lights and shadows play on it. It takes a little practice to get it right, but hey, practice makes perfect!
Add details
Sometimes you will need to add some details on the letters themselves. Add anything from a simple inline to intricate flourishes and shading. Let's take a look at just a few examples:
There is no rule for how to add these, except for keeping the letterforms legible and relevant to your project.
Adding decorative elements
At times, you'll want to fill the empty space around your letters. Again, keep the letters readable at all times.
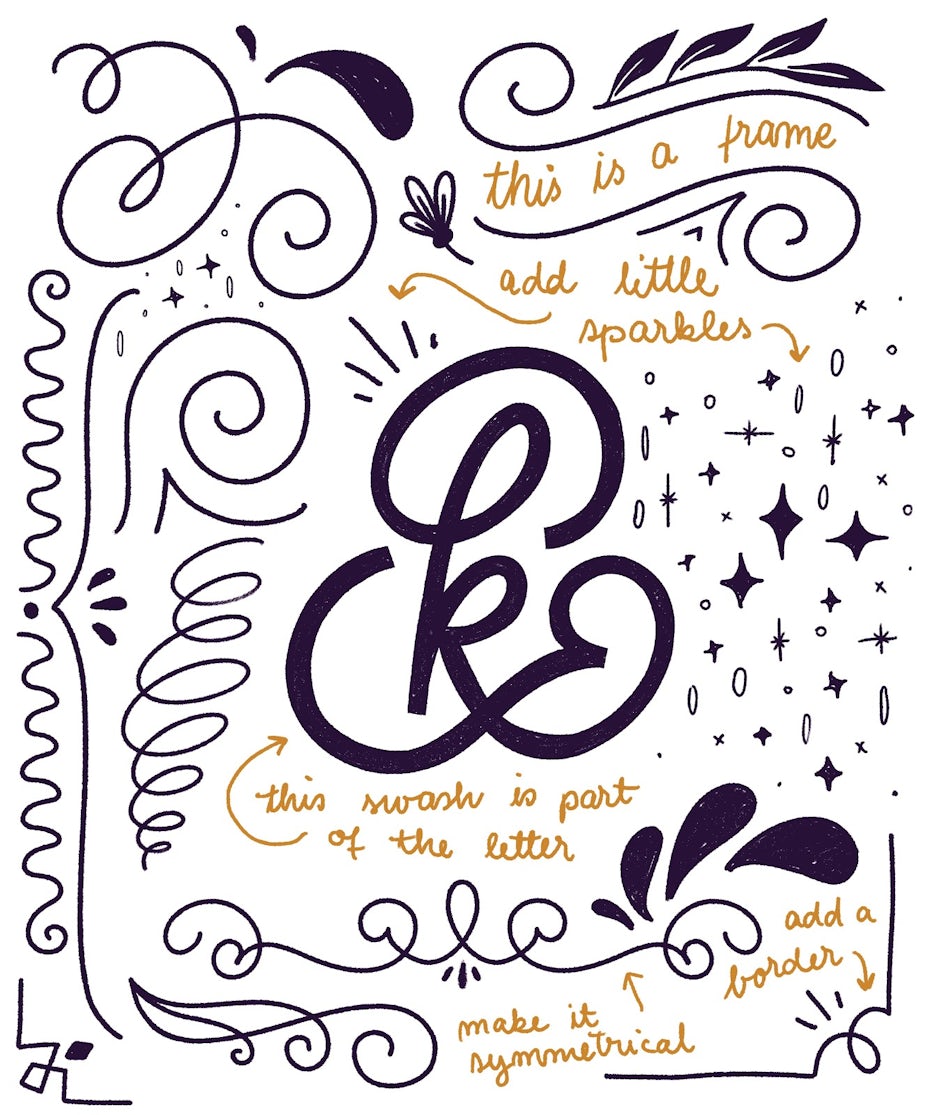
Make sure you don't go too crazy with the flourishes and little decorative elements. Or if you choose to go crazy, do it in a way that fits your concept and style.
These flourishes and swashes can be part of your letters or stand on their own. Either way, they can help balance out your composition and make your letters stand out.
5. Draw expressive letterforms
Let's do some actual lettering!
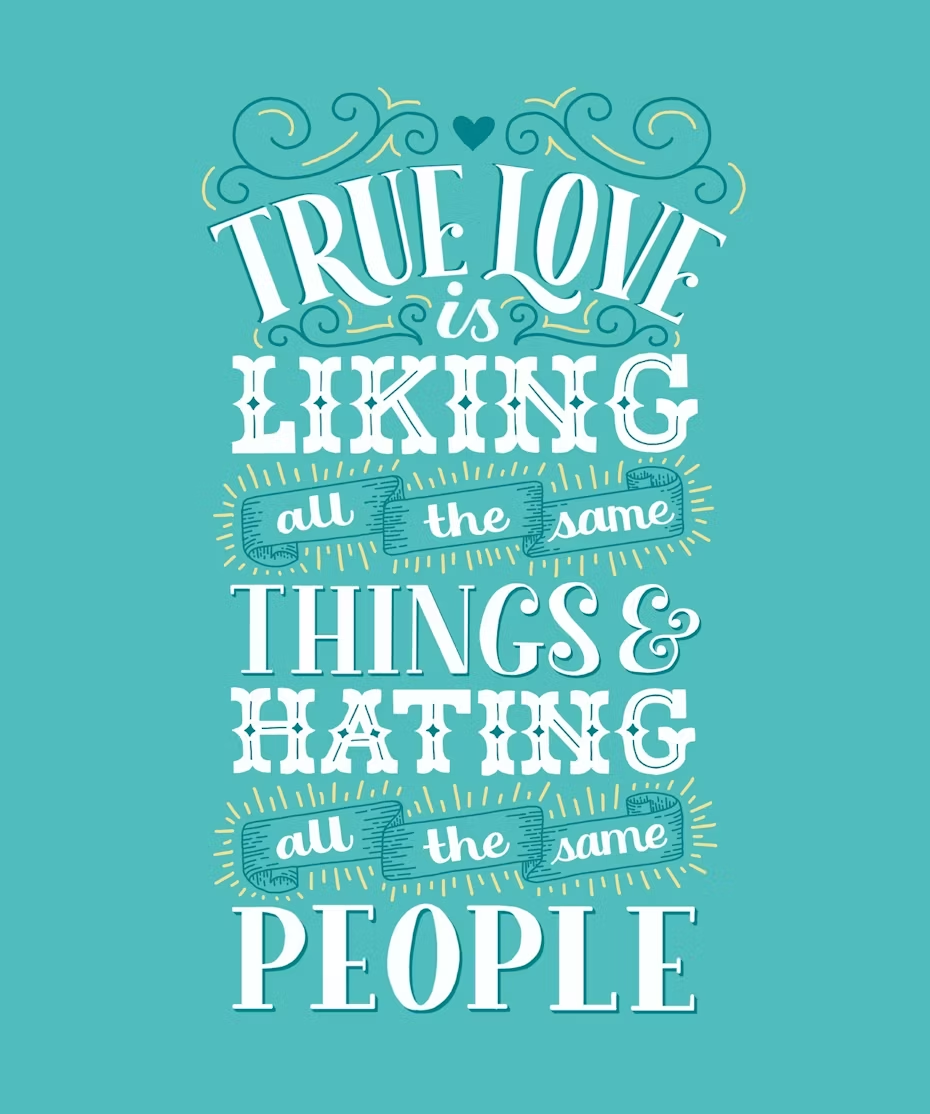
As a hand letterer you need to be able to express feelings and emotions solely with the style of the drawn letters. For example, you most probably won't be using a decorative, circusy slab serif for the title of a fancy event invitation (except if it's a circus conference?) or a sophisticated script lettering for a sports magazine cover.
Practice by trying to illustrate random words with the help of letters. Pick your word and think about what feelings can that word evoke. Write a list with everything that comes to your mind when you think about the given word. You can write objects, feelings, styles, anything. The longer the list, the better.
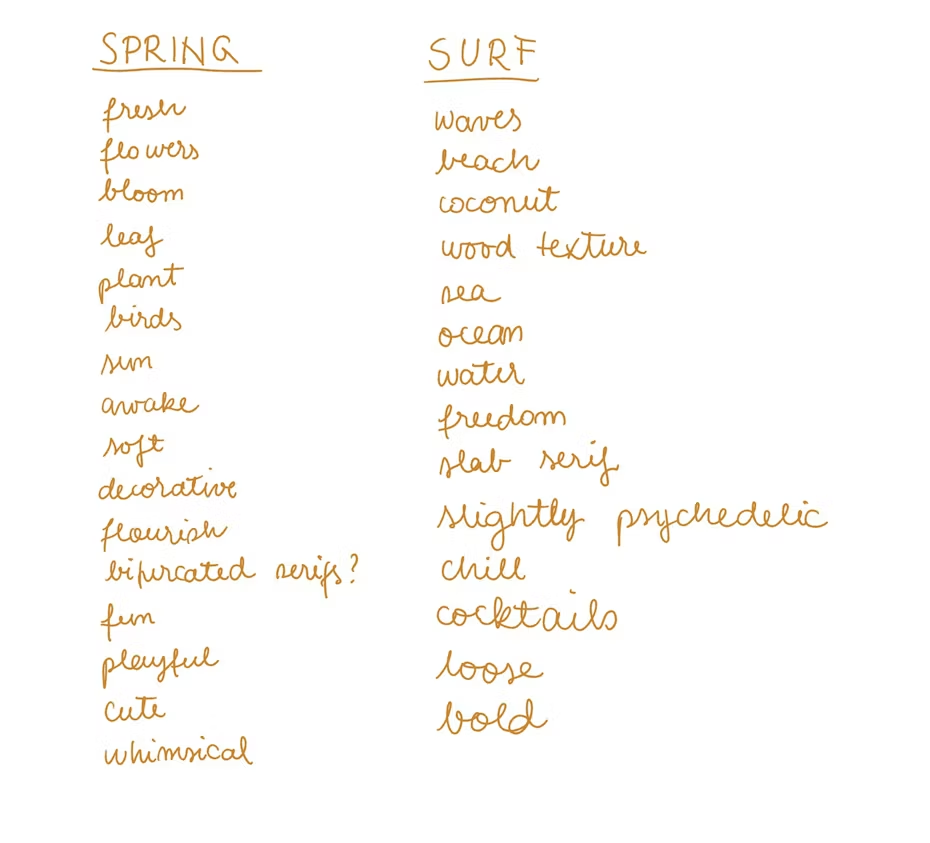
You don't have to use each of these ideas, but it's useful to see them all and use the ones that fit your concept the best.
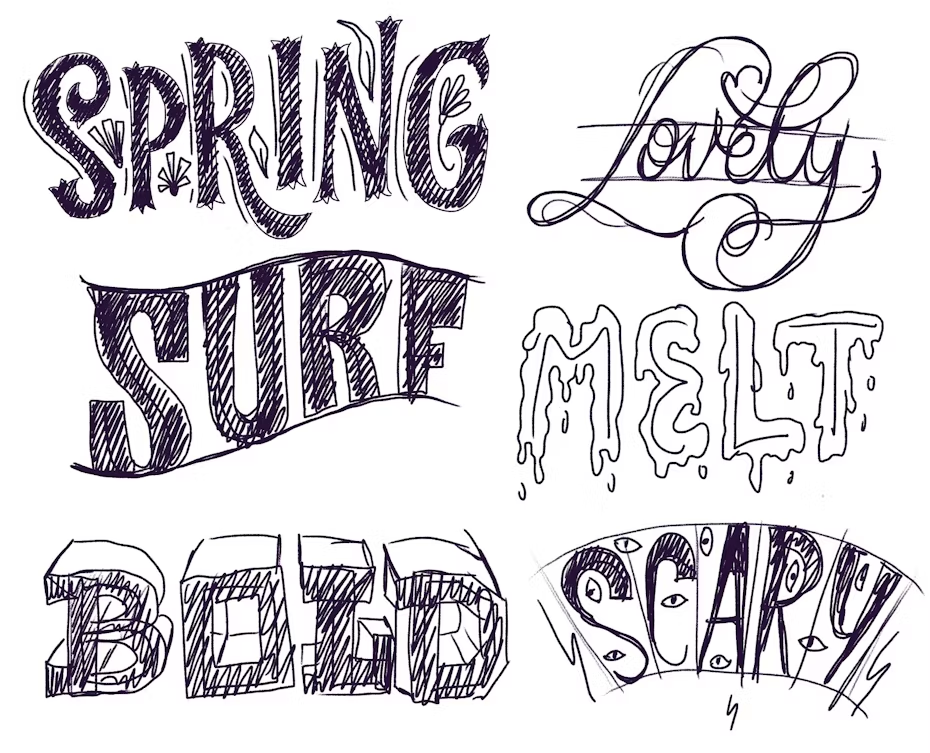
After you feel like you got everything you need, start drawing. At first, focus solely on getting the idea from your head to the paper. Don't get precious with your sketches. Don't focus on details, and don't get sad if you mess it up. A sketch is supposed to be messy! Try to sketch fast, without overthinking it and listen to your instincts. Sketch out more than just one concept for the chosen word so that you'll be able to choose the best.
A little trick about sketching is to always start with the skeleton of the letters and add weights after. You'll have a solid foundation to build on so you'll be able to concentrate on the very construction of the letters.
Also, try to not only draw the word in a certain style, but use objects to represent it. For example, you might build the word 'bones' from little letter shaped bones or draw actual melting letters for the word 'melt'.
After you've narrowed it down to one concept per word, keep sketching and refining. This is where you add dimension, flourishes and decorative elements. Reference your list to use relevant elements!
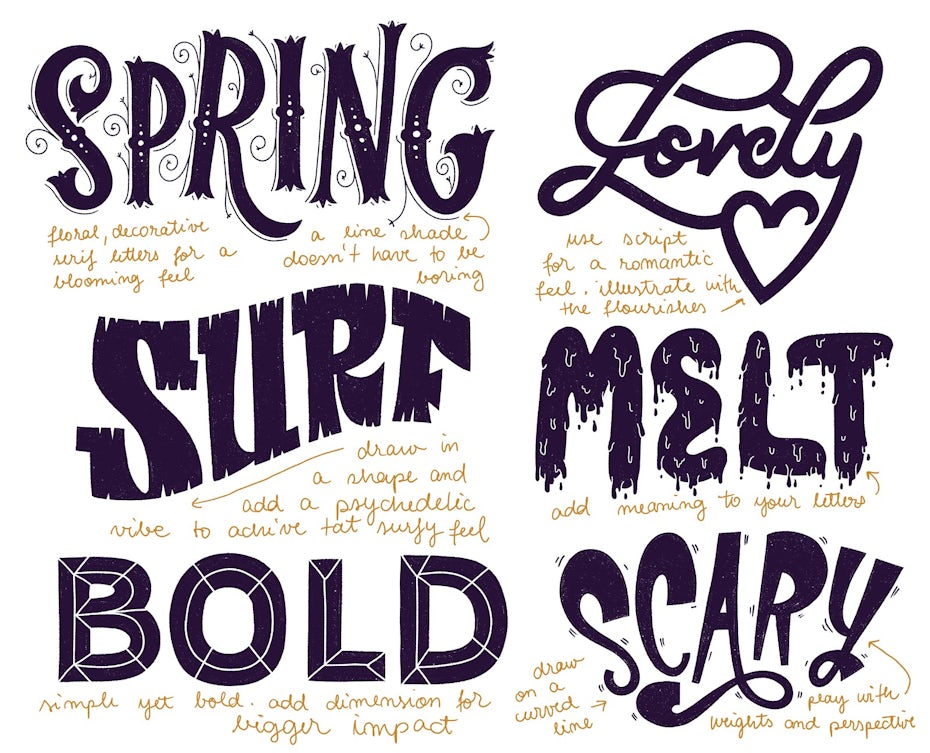
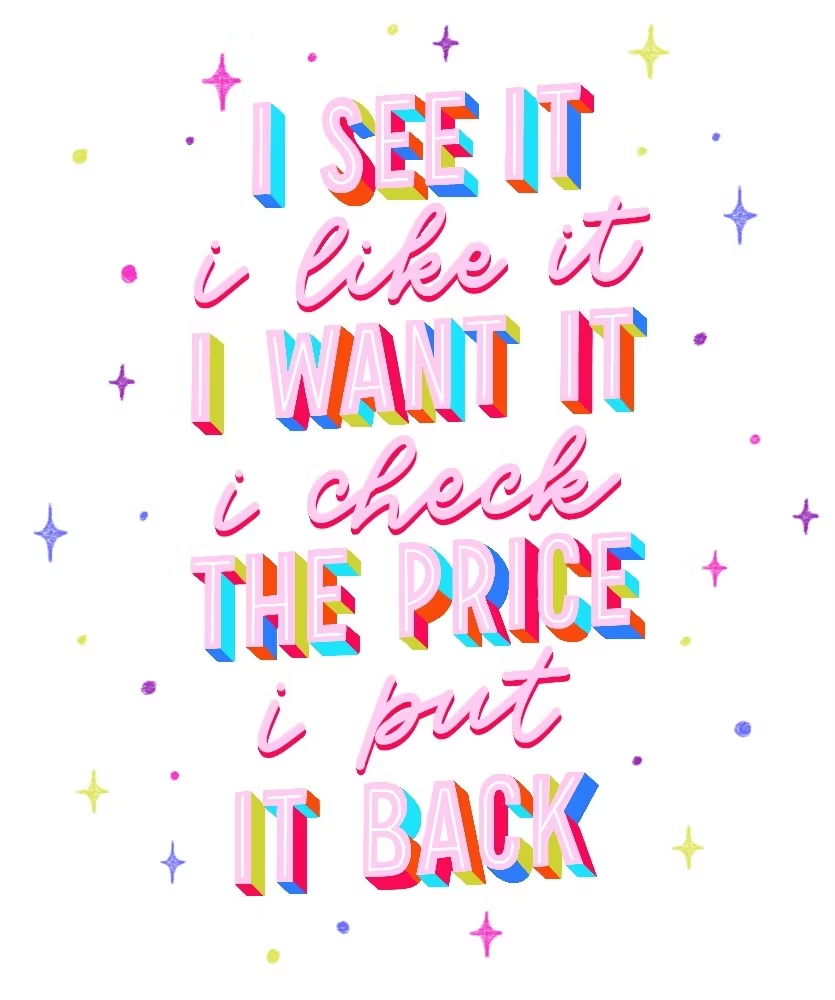
Now, instead of using one style to define the word, use many different styles to give the same word different meanings.
Follow the same pattern: choose your word, write the list and get sketching! Again, don't get precious with your initial sketches, just let your ideas flow. Think about the many emotions one word can evoke. You'd be surprised to see how the vibe of one word can change just by drawing it differently.
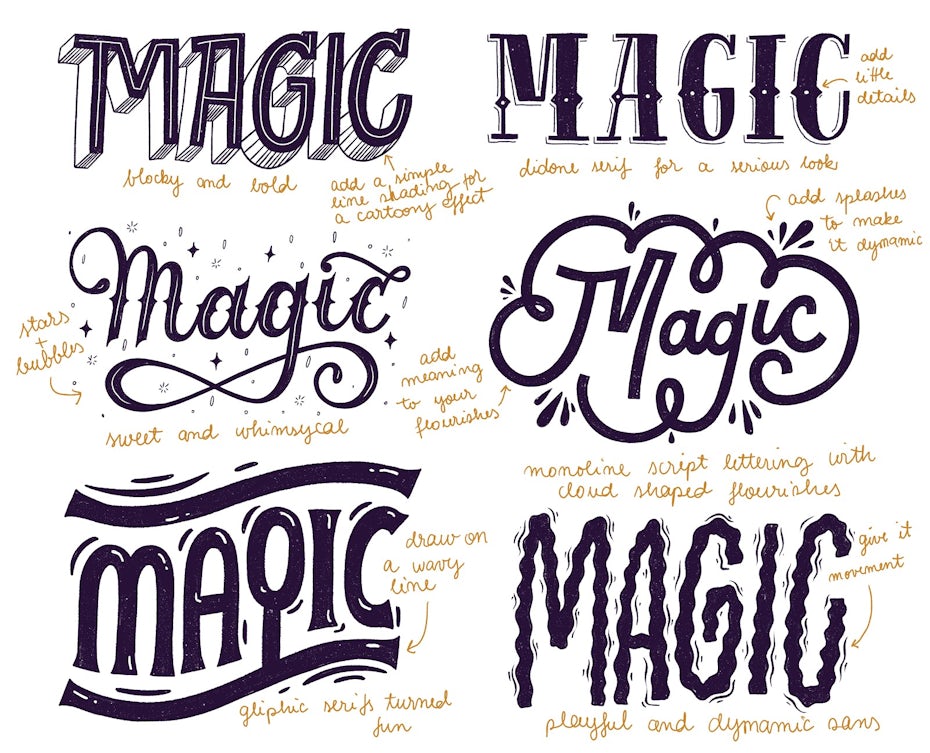
Pretty fun, isn't it? You can repeat this exercise daily and you'll start to see improvement sooner that you might expect. Don't forget to keep your letters legible, but allow yourself to make mistakes!
Bring hand lettering to your own designs!
—
If you made it through this tutorial, you're awesome and one step closer to mastering the art of hand lettering. Be proud! I know that getting started can be intimidating, but you'll soon find that hand lettering can be such a fun form of art.
You probably have the urge to jump into hand lettering head first, and start drawing intricate, detailed quotations. But first, get comfortable with drawing a single word. You can't build a house if you don't have strong bricks, right? With these basics, you have endless possibilities to draw letters and improve your skills.
Once you start creating, share your work with the world! Remember, everyone started out as a beginner, and everyone needs their fellow artists to give them a little nudge every now and then.
>> Ready for the advanced class? Read our tutorial to hand lettering quotes and sentences.
Source: https://99designs.com/blog/design-tutorials/basics-of-hand-lettering-tutorial/
0 Response to "Cool Easy Sign Designs Easy Poster Board Design"
Post a Comment